Various problems are often encountered during drilling construction. Take targeted preventive measures for different problems to achieve prevention in advance, avoidance during the process, and timely treatment afterward. To ensure construction quality, it is necessary not only to strictly ensure that each process meets the requirements, but also to actively avoid various common problems.

Specific Requirements for Each Step
1. Prepare mud: Determine the mud consistency according to the drilling method and the stratum conditions. If the mud is too thin, the slag discharge capacity will be small and the wall protection effect will be poor; if the mud is too thick, the impact capacity of the drill bit will be reduced, affecting the drilling speed.
2. Embed the casing: When the drilling depth is large, the hydrostatic pressure may cause the hole wall below the groundwater level to collapse. Therefore, embedding the casing can balance the groundwater pressure outside the hole or increase the water pressure inside the hole to prevent collapse, and at the same time isolate surface water.
3. Install and position the drilling rig: Since the stability of the foundation affects whether the drilling rig tilts, for soft foundations, the ground can be leveled with a bulldozer and covered with steel plates to provide sufficient stability.
4. During drilling, continuously add mud and thick slag, and observe at any time whether the hole is deviated. Reasonably plan the drilling sequence to ensure that the construction of the pile hole does not affect the previous pile holes, and the moving distance of the drilling rig should not be too far.
5. Clean the hole: After the last pile hole meets the design requirements, immediately carry out hole cleaning to ensure that the mud does not settle due to too long an interval, causing the borehole to collapse.
6. Pour concrete: After hole cleaning is completed, vertically hoist the prefabricated reinforcement cage into the hole and fix it after positioning. Pour concrete through a tremie pipe. The pouring must not be stopped during the process; otherwise, pile breakage will occur.

Common Problems and Prevention
1. Water seepage from the casing [Water seepage from the outer wall of the casing can cause foundation settlement, casing tilt and displacement, resulting in deviation of the pile hole.]
Preventive measures
(1) When embedding the casing, use clay with optimal moisture content to compact the pit bottom and surroundings in layers;
(2) Open holes at appropriate heights on the casing to maintain a water head of 1–1.5 m inside the casing;
(3) Prevent collision with the casing when lifting and lowering the drill bit;
(4) Fill and reinforce the surroundings with clay. If the casing sinks or displaces seriously, rework and re-embed it.
2. Extremely slow drilling or no penetration [Drilling in hard plastic clay layer for 8–10 hours accounts for 60%–70% of the drilling time of a single pile.]
Preventive measures
Replace with a suitable drill bit, arrange the correct tool angle, shape, and arrangement direction, increase counterweight, strengthen slag discharge, reduce mud specific gravity, or change the drilling method.
3. Collapse of the pile hole wall [During or after hole formation, bubbles continuously appear in the mud discharged from the hole, and the water level in the casing suddenly drops.]
Preventive measures
(1) Properly deepen the casing, compact the backfill, increase the specific gravity and viscosity of the mud, raise the casing, replenish mud after final hole formation, and ensure the fabrication quality of the reinforcement cage to prevent deformation;
(2) When hoisting, align with the hole position, lift straight and steady, lower slowly, and prevent collision with the hole wall;
(3) The waiting time for pouring after hole formation should generally not exceed 3 hours, and pouring should be completed as soon as possible;
(4) If the reinforcement cage has not been lowered into the hole, backfill the collapsed hole with a mixture of mortar, sand, and clay to 1–2 m above the collapse depth, or backfill the entire hole and compact it, then ream the hole with the original drill bit and high-quality mud;
(5) If slight collapse is caused by the reinforcement cage hitting the hole wall, ream the hole with a drill bit smaller than the inner diameter of the reinforcement cage using high-quality mud, or clean the hole with a tremie pipe.
4. Pile breakage [During concrete pouring, the tremie pipe is pulled out of the concrete interface, allowing muddy water to enter the pipe, causing the pile body to become smaller or pile breakage.]
Preventive measures
(1) When the tremie pipe is pulled out, quickly insert the pipe into the concrete, extract the water in the pipe with a small water pump or other equipment, and then continue pouring concrete.
(2) Quickly lift the tremie pipe, reinstall the water-stop ball to flush out the pipe, then lower the pipe again until it cannot be inserted. At this time, slightly lift the pipe and pour concrete.

5. Reinforcement cage falling [Sinking cage: During concrete pouring, the reinforcement cage that has been sunk to the design depth falls, causing the reinforcement skeleton to be lower than the original design position.]
Preventive measures
If sinking cage is found when chipping off the floating slurry of the pile head after excavating the foundation pit, re-pile work must be carried out, or relevant designers shall verify and adopt corresponding reinforcement measures on the foundation structure.
6. Reinforcement cage floating up [Reinforcement cage floating up means that the reinforcement skeleton that has been sunk to the design depth is higher than the original design position during concrete pouring.]
Preventive measures
(1) If the reinforcement cage can be pulled out, stop pouring concrete, pull out the reinforcement cage, re-drill in situ, flush the concrete with high-pressure water, and then carry out a series of processes such as in-situ drilling and hole cleaning.
(2) If the reinforcement cage cannot be pulled out, continue pouring concrete while cutting the reinforcement cage as it floats up until it can be pulled out, and then carry out a series of processes such as in-situ drilling and hole cleaning.
7. Local necking of pile hole [Local necking means that the local hole diameter is smaller than the design hole diameter.]
Preventive measures
(1) Use high-quality mud, control the specific gravity and viscosity of the mud, and reduce water loss;
(2) When the design pile spacing is <4d, construct with 1–2 piles skipped;
(3) Start drilling new piles as far as possible 36 hours after the adjacent piles are completed;
(4) Use a cage-type drill bit with double guide rings to protect the diameter;
(5) Ream the hole with mud and a drill bit of sufficient size;
(6) Pour concrete as soon as possible after reaming and cleaning the hole.
8. Deviation and inclination of pile hole [After hole formation, the pile hole has a large vertical deviation or bending.]
Preventive measures
(1) Install the drilling rig upright, level, stable, without constrained front edge tangent points, and the center of the rotary table, the center of the casing, and the center of the drill pipe should be in a straight line;
(2) The casing should not be inclined, the drill pipe should not be bent, the active drill pipe should be kept vertical, add guide frames, control the lifting swivel, and use drill collars for pressure as much as possible;
(3) Remove underground obstacles;
(4) In addition to using light pressure and slow rotation technical parameters for soft-hard interbedded layers, when entering hard plastic clay layer from soft plastic clay layer, especially fluid plastic clay layer and sand layer, or when entering bedrock from clay layer, the conical guide small drill bit at the lower end of the cage drill should be changed to a flat-bottom guide small drill bit, or directly use a flat-bottom drill bit without a guide small drill bit for drilling;
(5) Use open caisson, hole-controlled pile, and other methods to remove underground obstacles;
(6) When deviation occurs in the hard plastic clay layer, backfill the deviation with a mixture of sand and material soil to 1–2 m above the deviation, and after compaction, use a flat alloy drill bit with light pressure and slow rotation to correct the inclination;
(7) Spread 20–40 mm crushed stone slightly higher than the deviation, compact by impact, and then use a flat-bottom alloy drill bit, roller cone drill, or flat-bottom steel shot drill bit to correct the inclination.
9. Excessive sediment at the bottom of the hole [Sediment at the bottom of the hole, residual mud and sand too thick, or soil from the hole wall collapsing to the bottom.]
Preventive measures
(1) After final hole formation, raise the drill bit 10–20 cm above the hole bottom, keep idling at a slow speed, and maintain circulation hole cleaning for no less than 30 minutes;
(2) Use high-quality mud for hole cleaning, control the specific gravity and viscosity of the mud, do not directly replace with clean water, and slowly lower the reinforcement cage vertically into the hole;
(3) The sediment thickness should be calculated separately according to different types of drill bits;
(4) Use a tremie pipe for secondary clean water flushing, and the flushing time is based on the sediment thickness at the bottom of the hole measured inside the tremie pipe meeting the specification requirements;
(5) Increase the impact force on the hole bottom during initial concrete pouring. The distance from the bottom end of the tremie pipe to the hole bottom should be controlled at 30–40 cm. The initial concrete volume must meet the requirement that the bottom end of the tremie pipe can be embedded in the concrete by more than 1.0 m. Use a water-stop plug and concrete to flush residual sediment.
Collaborative Development, Leading the Future — XCMG Foundation Invited to Attend Industry Events
下一篇Performance Express | CRCHI Overseas Revenue Up 512.04% Year-on-Year, Delivering More Mega Equipment to Global Customers

2024-09-29 13335 0

2024-09-20 13336 0

2024-09-20 13180 0

2024-09-19 12457 0

Lize City Air Terminal Underground Main Structure Nearing Completion: Maximum Transfer Walk Under 4 Minutes After Operation

Anti-seepage Curtain for Main Lock Pit of CSCEC Port Shenqiu Double-Line Lock Project Completed on Schedule

All Pile Foundations Completed on Quanzhou Baiqi Channel

Hainan Upgrades Housing and Municipal Infrastructure
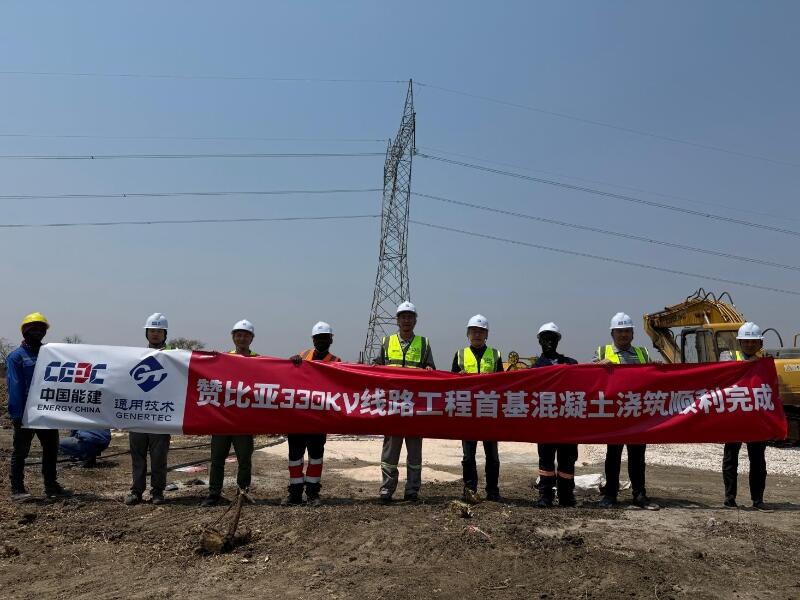
First Foundation Concrete Pour Successfully Completed for Zambia Kafue West–Muzuma 330kV Transmission Line EPC Project
Hot News

评论 (0)